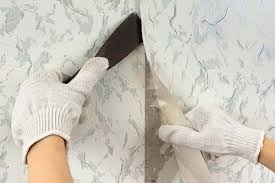
Bubbles or blisters on painted weatherboards can occur due to various factors, including improper surface preparation, moisture issues, or application errors. Here’s an explanation of potential causes and some preventive measures:
1. Moisture: Moisture trapped underneath the paint film can cause bubbles. This can happen if the surface wasn’t adequately dried or if there are leaks or moisture penetration from the backside of the boards. To prevent this, ensure the weatherboards are dry before painting and address any underlying moisture issues.
2. Inadequate surface preparation: Insufficient cleaning, sanding, or removal of old paint can lead to poor adhesion, resulting in bubbles. Properly prepare the surface by cleaning it thoroughly, removing loose paint, and sanding to create a smooth and clean base for paint adhesion.
3. Applying paint in direct sunlight or extreme temperatures: Painting in high temperatures or under direct sunlight can cause the paint to dry too quickly, trapping air and resulting in bubbles. Work during cooler times of the day and avoid direct sunlight to allow the paint to properly adhere.
4. Use of incompatible products: Using incompatible or low-quality paint or primer can lead to issues like poor adhesion or blistering. Ensure you’re using appropriate products recommended for exterior use and follow the manufacturer’s instructions.
To fix and prevent bubbles on painted weatherboards:
1. Assess the extent of the issue: Determine the cause of the bubbles and evaluate the overall condition of the paint. If the bubbles are widespread or the paint is severely compromised, it may be necessary to remove the affected paint and start with a fresh coat.
2. Remove bubbles: For localized bubbles, carefully scrape or sand the affected area until the surface is smooth. Fill any voids with a suitable exterior-grade filler and sand it flush with the surrounding surface.
3. Repaint: Apply a high-quality primer and topcoat specifically designed for exterior surfaces. Follow the manufacturer’s instructions regarding proper application techniques, including recommended drying times and temperature ranges.
4. Ensure proper surface preparation: Thoroughly clean the weatherboards, remove any loose or flaking paint, and sand the surface to create a suitable substrate for the new paint to adhere to.
5. Consider professional help: If you’re uncertain about the best approach or if the issue persists, it’s advisable to consult a professional painter who can assess the situation and provide expert advice or assistance.
Remember, prevention is key. By ensuring proper surface preparation, using quality materials, and working in optimal conditions, you can minimize the chances of bubbles or blisters forming on your painted weatherboards.


